
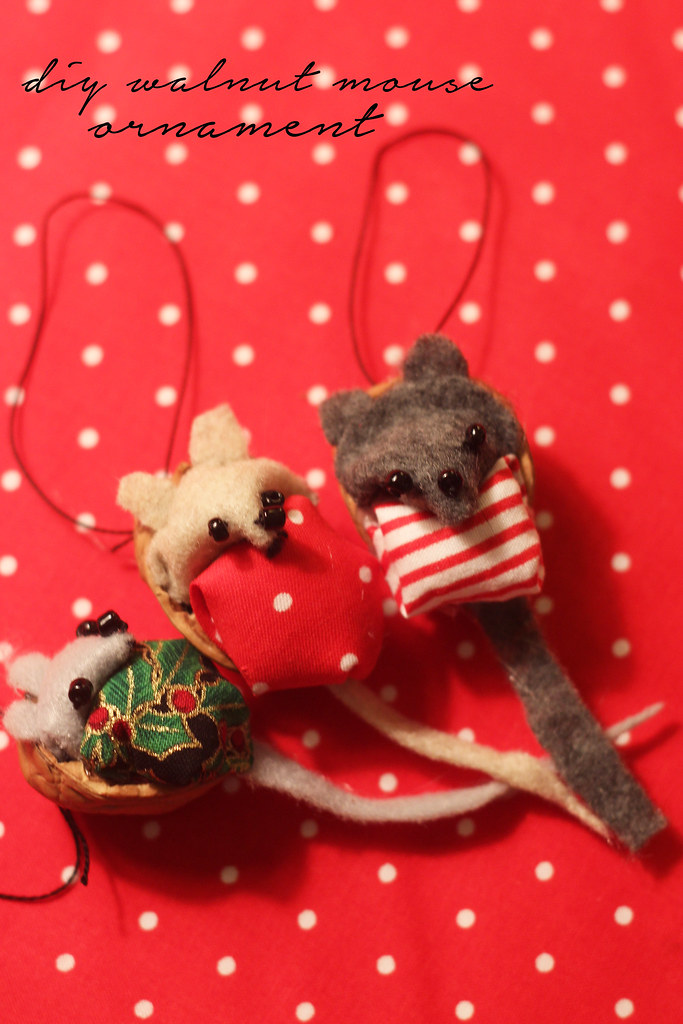

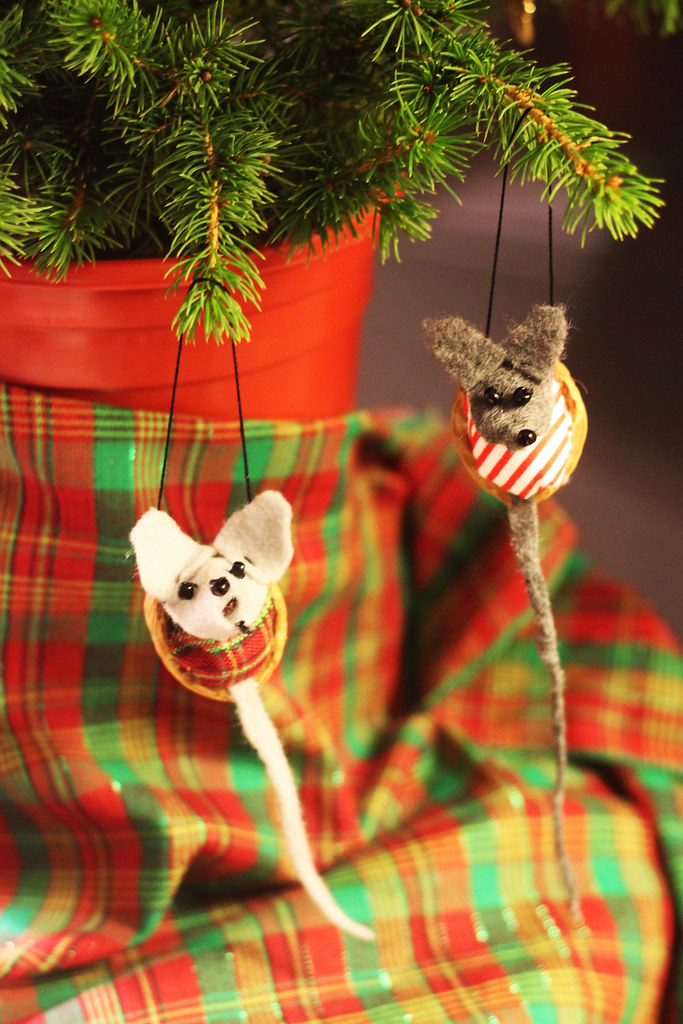
Ben and I both have memories of walnut mouse Christmas ornaments on our trees at home. He made his with his family - using little walnut bodies and hazelnut heads, drawing on eyes and whiskers. I remember my mom's walnut mice as little nuts wrapped in fabric bonnets that peered out across the tree. We didn't make them together but they occupied a special place on the tree. I've talked about my love of going through boxes of Christmas ornaments with my mom and reminiscing about their origin and the mice represent that for me - the excited wait for the Christmas season and then all of the nostalgia and sweet memory it brings back.
When brainstorming a Christmas craft that we could do together (last year we made floral cone Christmas trees with yarn), we settled on something nostalgic - a walnut mouse all our own. A new memory to mark the season and a craft that was both in anticipation of our future traditions and a reflection on our family's traditions. We lit our new Glade Under the Mistletoe candle, turned on Tchaicovsky's Nutcracker and filled the house with the scent and sounds of Christmas cheer!
This craft is really pretty easy, but plan on committing some craft store time and some detailed work with a needle and thread. I made about 4 mice in about an hour and a half. With four hands instead of two, we made a healthy amount of mice for our tree! It's also really fun to do with family - everyone's mouse comes out with a unique little face and blanketed body. Read on for more inspiration!
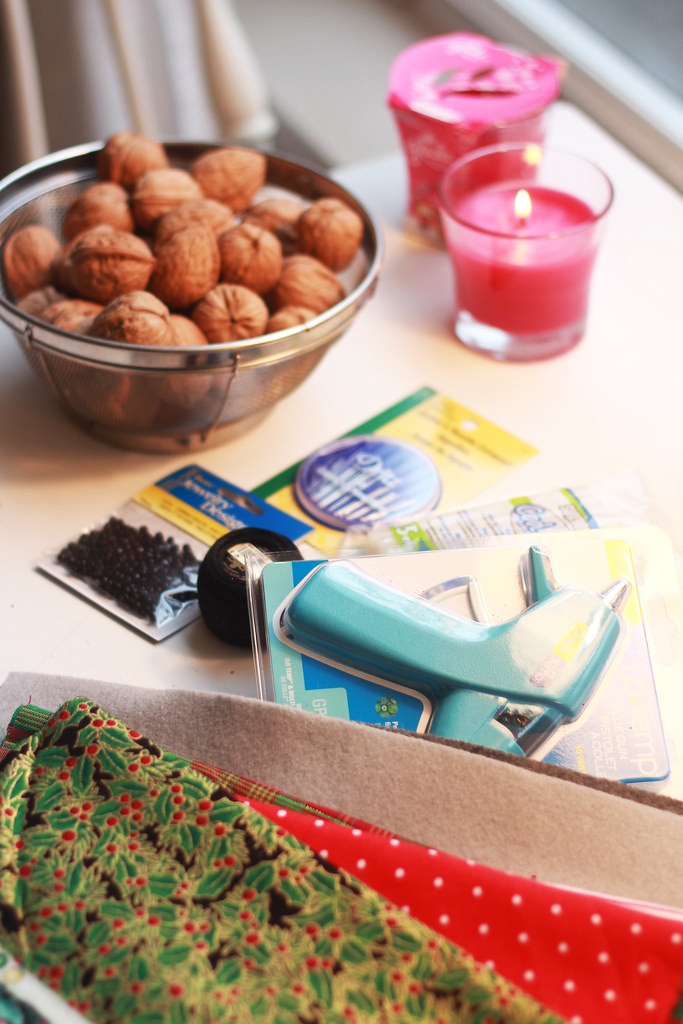
You'll need:
1 bag of walnuts (in shell and cracked, preserving half of the shell)
Scraps of Christmas fabric (I got four 1/4 yard scraps)
2-4 sheets of felt
Black beads
Black embroidery floss or thread
Needles
Cotton balls
Glue gun
*A festive mood is optional but highly recommended! Check out Glade's Under the Mistletoe candle that smells of holiday juniper and holly and download Glade's holiday song (inspired by the Sparkling Spruce candle scent I shared in November), "This is my Wish" by Kevin Ross for free here

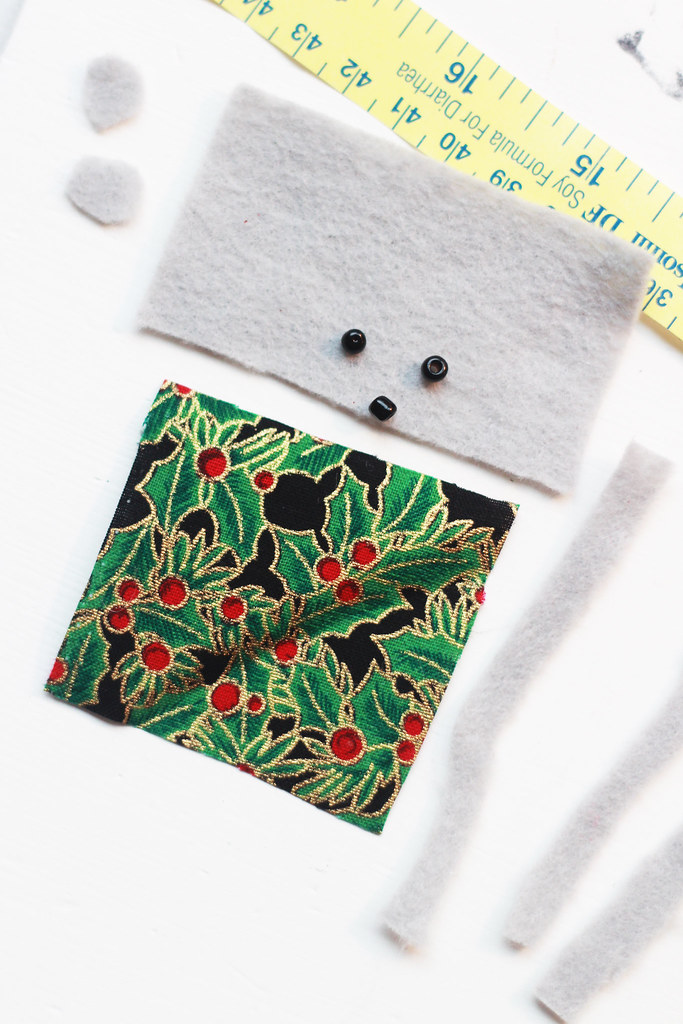
Step 1:
Cut a swatch of Christmas fabric (about 2"x2"), a piece of rectangular felt (about 1.5"x2"), a thin piece of felt for the tail, and two small circles of felt for the ears.
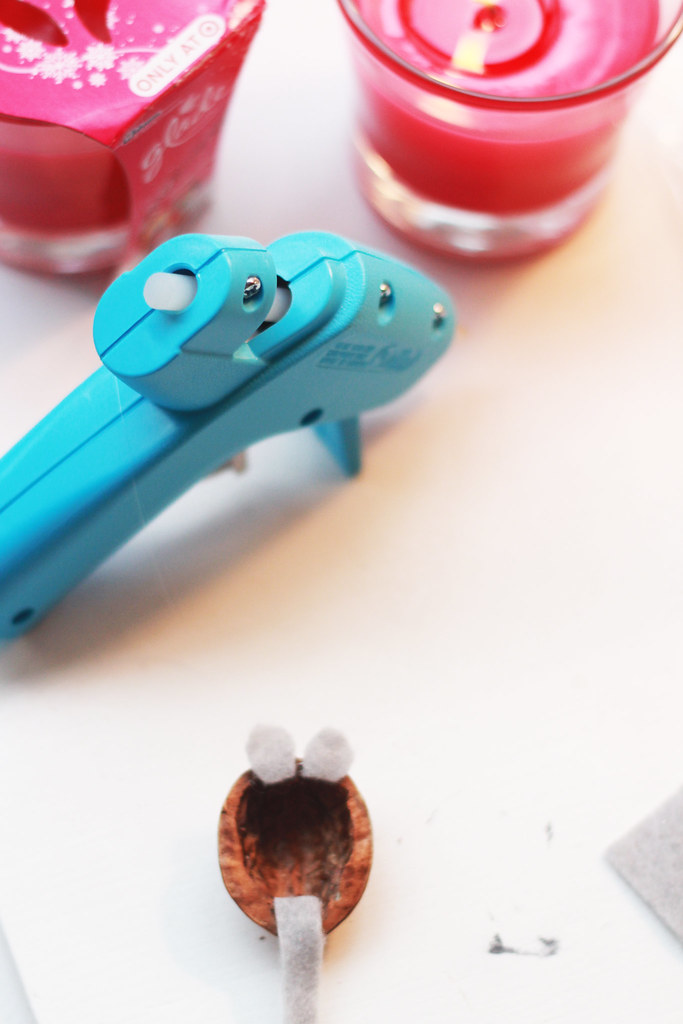
Step 2: Crack your walnut, preserving half of the shell and remove the nuts. Glue in the tail and ears with a hot glue gun to the walnut. Let dry.
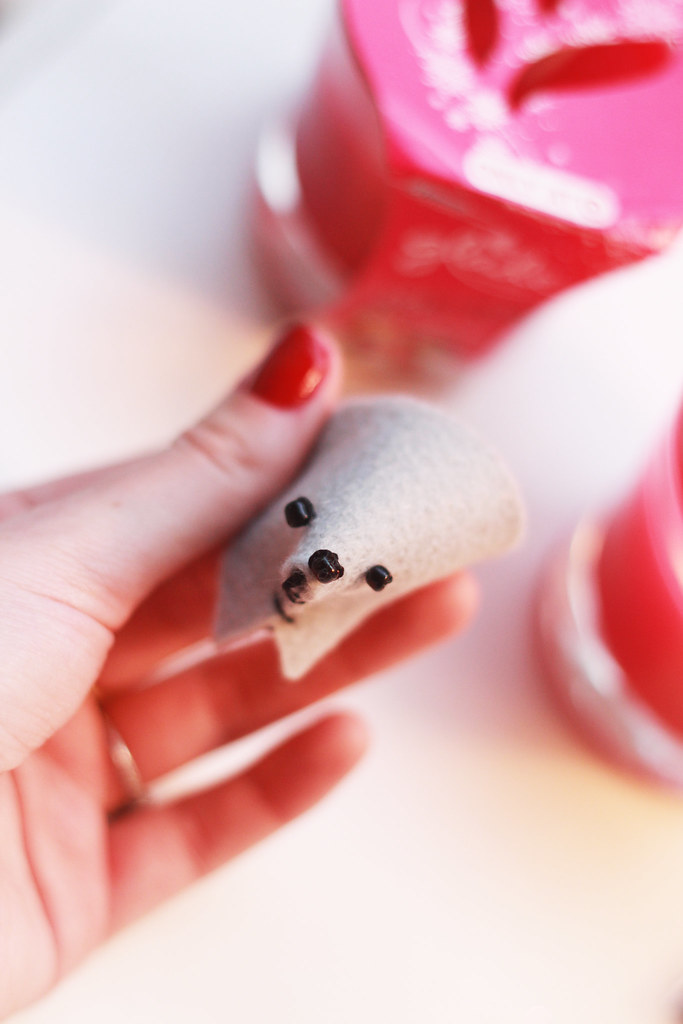
Step 3: Sew on the eyes and nose beads using a piece of black embroidery floss or thread. The nose bead should be near the edge of the bottom of the piece of felt. Once sewn in, fold over the piece of felt into a cone shape and make a few quick stitches below to keep the felt in a cone shape. Put a tiny piece of cotton ball in the nose to give it shape.
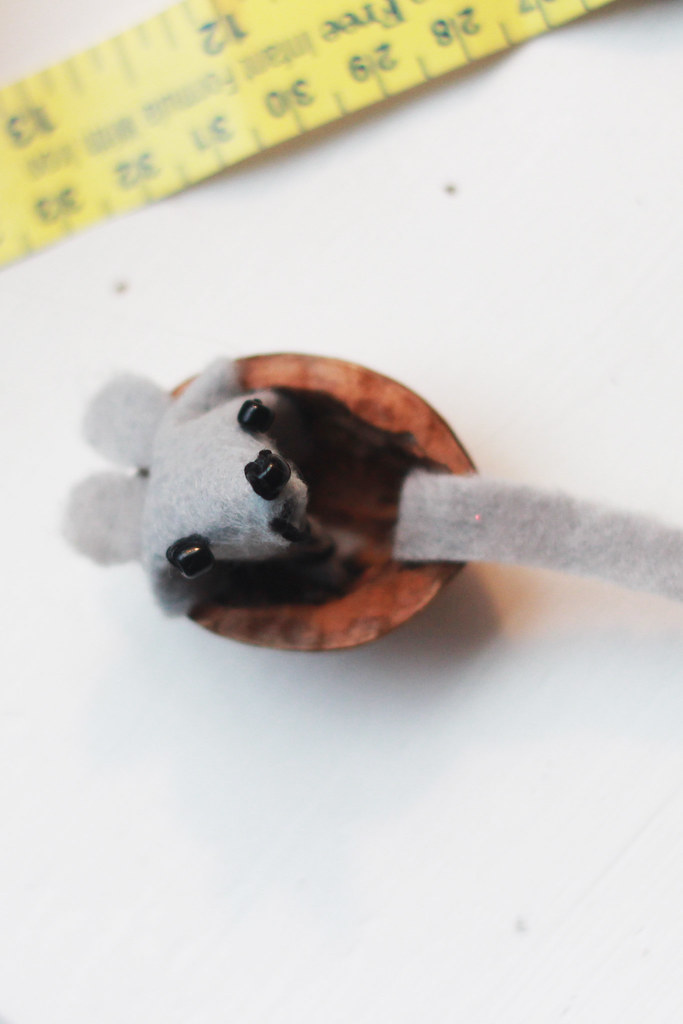
Step 4: Glue the head into the top of the walnut shell. Though the step is not pictured here, take your swatch of fabric, fill it with a cotton ball, tuck in the loose edges and glue the cotton ball into the walnut. See the image below for an idea of how the fabric swatch should stick out of the walnut shell!
You're done!


I was selected for this opportunity as a member of Clever Girls and the content and opinions expressed here are all my own.
I'm allergic to nuts so I couldn't do this, but they are adorable!
ReplyDeleteSo stinkin' cute - these are totally Etsy worthy! You look like you're all too graceful with the hot glue gun - I'd have burns all over my fingers.
ReplyDeleteThese are so cute!! My parents made walnut ornaments their first Christmas together and they still use them. Sounds like a great tradition to do an ornament craft project together each year!
ReplyDeleteHow adorable. You know, I have a vague memory of at least having (if not making) these when i was a kid! Maybe I should give these a try this year.....
ReplyDeleteAdorable!!
ReplyDeleteThese are great! Bookmarking this!
ReplyDeleteSo adorable! What a fun idea.
ReplyDeleteOH! It is adorable. I love it. The kiddo and I are making some ornaments this year... maybe I'll incorporate some walnuts into them!
ReplyDeleteSo cute!
ReplyDeleteXO
Jeanne
http://fashionmusingsdiary.com
This is so cute!!! I am NOT crafty enough to take this on! But you did awesome!
ReplyDeleteJust when I thought I knew everything you could do with a walnut... ;)
ReplyDeleteSo so so freaking cute! Love those little guys!
ReplyDeletehttp://everythingsalwayssunny.com
Kristin xx
This was such a clever DIY. I'm in such a festive mood now :)
ReplyDeletexo,
Brie
My Fashion Fancies
Instagram
Oh my goodness, these little guys are the cutest!! Plus this is such a genius idea!! xo
ReplyDeleteThose are adorable!! I love this idea.
ReplyDeleteOh my gosh these ornaments are precious! Thanks for the idea. Pinning!
ReplyDelete