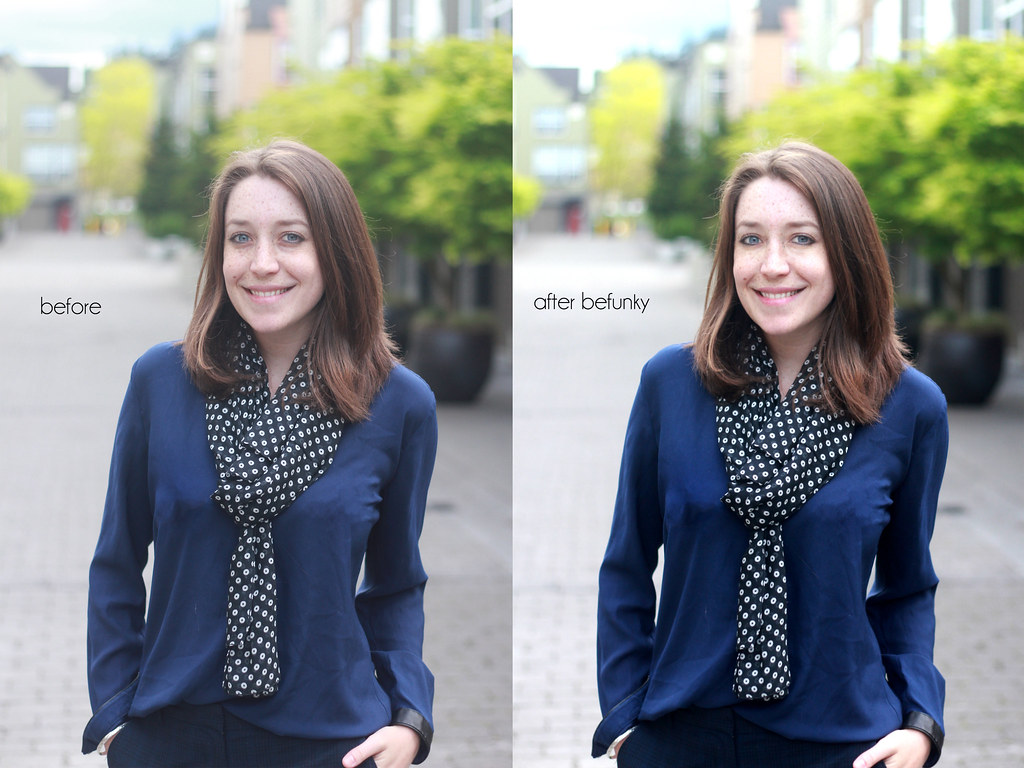
I believe that every single photo should be edited, and unless you are a professional that is shooting film (or something equally beautiful and warm), you should really be spending a lot of time turning straight-out-of-the-camera photos into share-worthy images that pop. You'd be surprised at how much better photos look with just a bit of increased contrast and brightness! I like to edit a few different elements of all of my photos*, including the ones I share on Instagram or Facebook:
1. The brightness, contrast, and sometimes exposure. It brings out detail, makes color stand out, and lends a polished look to most photos, iPhone or DSLR.
2. Blemishes, spots, wrinkles, and other unsightly elements in photos. I think it's always appropriate to clone away, smooth, erase these elements that distract the eye from the photo at hand.
3. Brighten the eyes, teeth, and boost color in the face. More on that below.
My favorite mobile and web app for editing photos, BeFunky (with a lot of the power of Photoshop Elements, but for free), just got a facelift. So naturally I've been touching up photos within the app for blog photos, work photos that need a quick edit, and my Instagram photos. The Portland-based company (yay, local!) has some of the best, and most robust, editing options out there to use that are entirely free. Here are some tips (for bloggers as well as other users that post anything from selfies to group photos on Instagram) for using the web app to touch up elements of your photos to give them that professional "pop."
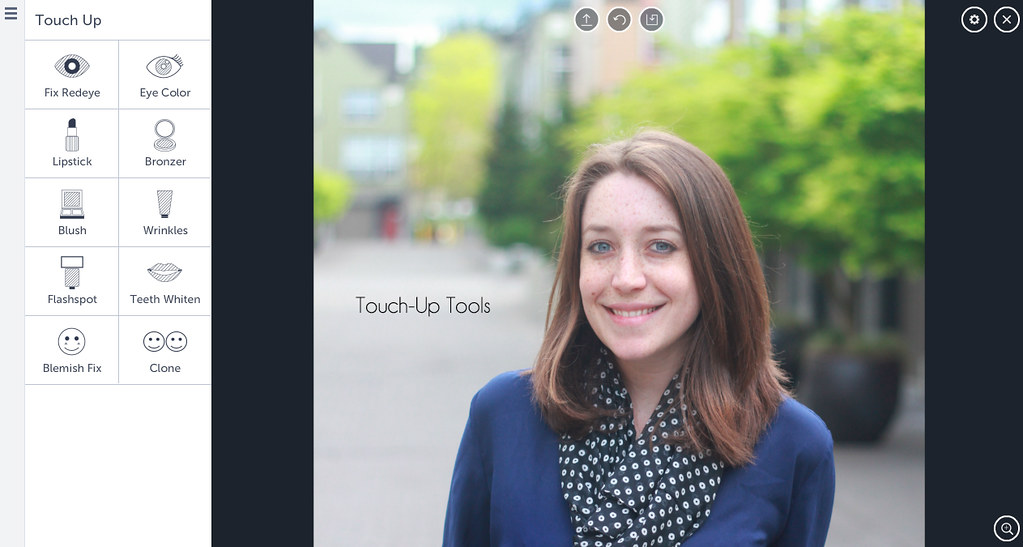
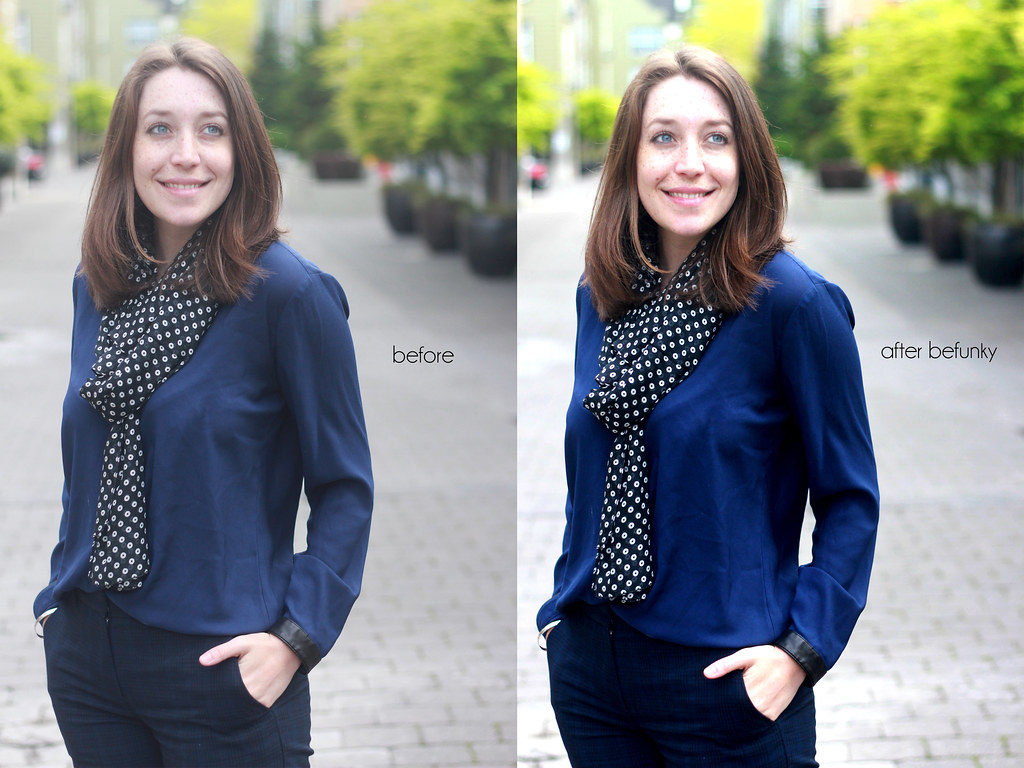
In this screenshot of BeFunky's web app, you can see the whole range of touch-up tools. My favorites are lipstick (seriously), blush, blemish fix, and teeth whiten. It may seem really bizarre to post-process your photos to the point where you'd be adding lipstick and changing your tooth color but my thought is: sometimes you need it and be subtle about it.
There are many occasions when we've taken a set of photos in bad lighting, or the perpetual Northwest grey, and my face looks pale and tired. I've had countless photos where I've taken an outfit set right after coming home and haven't had a chance to reapply lipstick or gloss. I think you know what happens to a face in grey, afternoon light after a day at work: it looks washed out and unattractive.
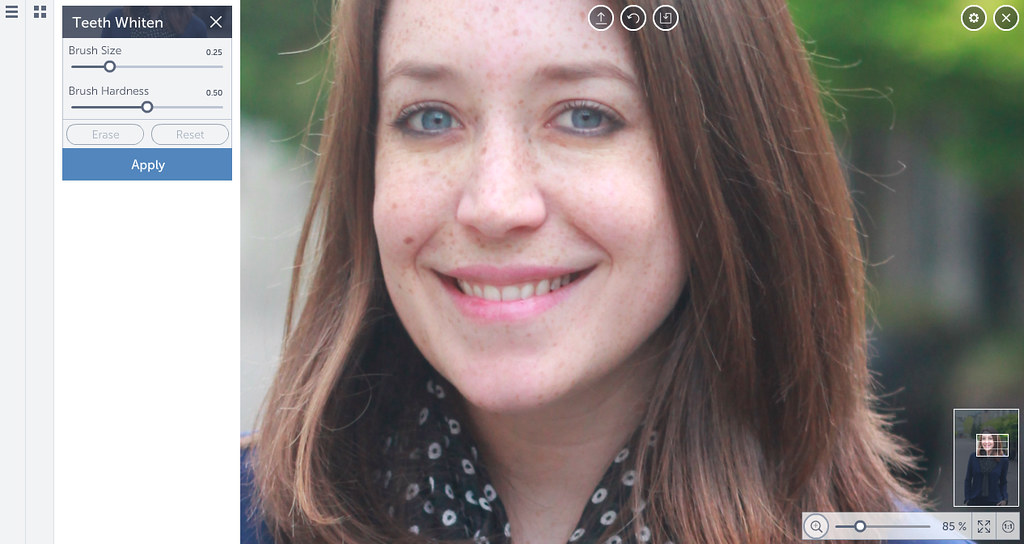
Tips to whiten teeth on the web app: size your brush to the size of your actual teeth. A big whitening brush will whiten your lips as well as your teeth and then we're right back to where we started. Decrease the brush hardness way down from the default 0.50 setting. I'd recommend going to a 0.25 hardness or lower to get a smooth look. Don't hesitate to use the tool to also whiten: the whites of your eyes that look red or dim in photos, whiten under-eye circles that are really prominent in photos.
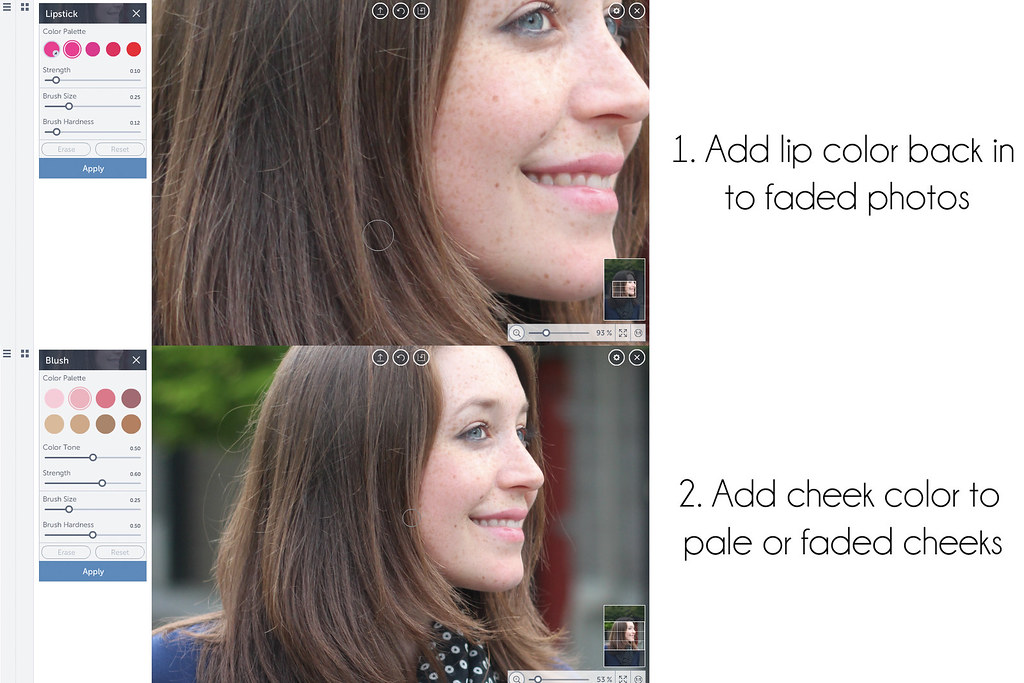
Tips to add lipstick, blush, or bronzer: again, remember to be very subtle! Size your brush to the actual size of your lips so you don't pull a Kylie Jenner and apply lipstick far beyond the range of your actual lips. Decrease the strength of the brush to 0.10 or below! You don't want to actually be drawing on large clown lips! Decrease the brush hardness to below a 0.25 for a smooth look. When applying and color through this editing tool, keep in mind that you're basically upping the saturation on your lips. Think of it less as applying fake lipstick or blush, more as increasing a natural color that's showing up faded in a photo. By very minimally tinting your lip or cheek color, your photo will appear far less washed out.
Tips to use the blemish tool: A blemish could be anything from an unsightly pimple on your face, a cat scratch on your hand/arm, or a set of swollen mosquito bites on your leg. The blemish tool is a spot correction tool that's super easy to use - just hover over said blemish, click, and it'll start to disappear.
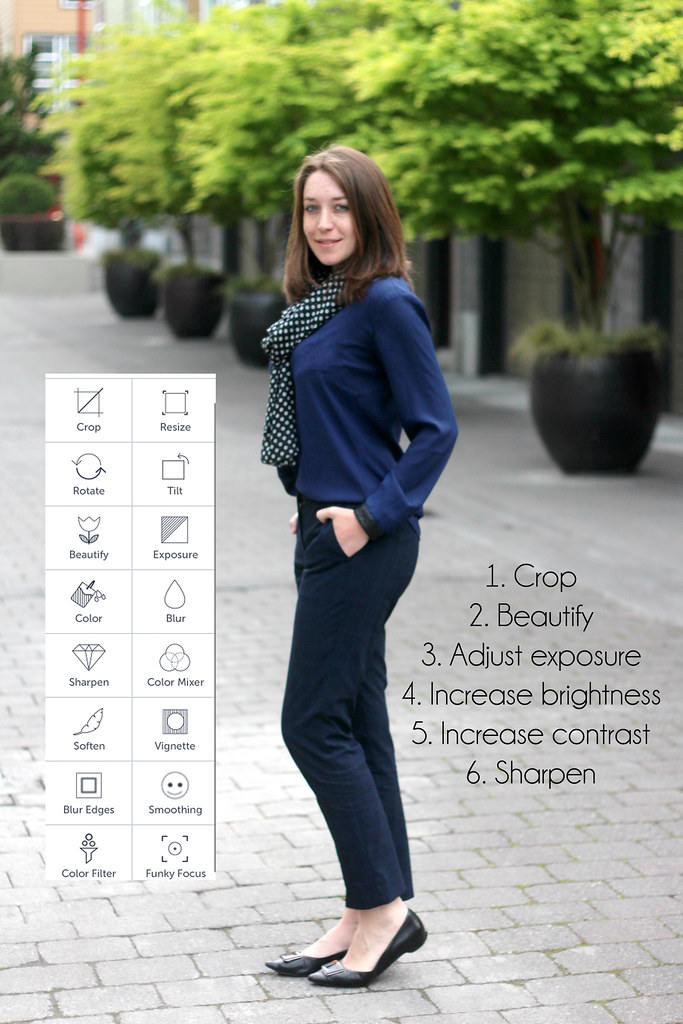
Finally, be sure to always use the tools on the BeFunky web app to finalize your photo. I recommend:
- cropping photos to remove distracting traffic cones or trash cans
- using BeFunky's beautify tool (at a low intensity) to boost color in your photos
- adjusting your exposure to add light in to a dark photo
- increasing brightness and contrast to every single photo
- sharpening photos to give them a crisper feeling

*As much as I like a good edit, I don't believe in editing yourself to look thinner or modifying your body in any way!
This post was sponsored by BeFunky, but as an avid user of their web app and a guest blogger at the BeFunky blog, all of these opinions are my honest and excited opinions about their product!
This post was sponsored by BeFunky, but as an avid user of their web app and a guest blogger at the BeFunky blog, all of these opinions are my honest and excited opinions about their product!
What a thorough and useful post! I have a fashion post coming up - I will be checking this up!
ReplyDeleteThis post came at just the right time for me! I recently got a new laptop and I wasn't overly fond of the photo editing software I was using (plus, I would have had to buy a NEW copy of my new computer..ugh!), so I'm off to check out BeFunky RIGHT NOW!
ReplyDeleteHaven't tried BeFunky, but I use Photoshop all the time.
ReplyDeleteI rarely edit photos before posting or printing. This is a good reminder to get out of that rut!
ReplyDeleteWow, you look great.I like to brighten my pictures only, but you did an amazing job.
ReplyDeletehttp://fabuloustorture.blogspot.com
Never heard of it but I will definitely be bookmarking this! I often am editing on my Chromebook (no Photoshop, booooo) so this would be a great help!
ReplyDeleteI have never heard of this app. Will have to try it out!
ReplyDeleteOK. Seriously. I can't think you enough for this. It does SO much more then current free editing website I am using. I have NO CLUE how to use Photoshop so this is such valuable info. Thanks Kelsey!
ReplyDeleteYay! I am so glad to hear this! I really love the App. There are upgrades available, but the free tools pretty much cut it!
ReplyDeleteYes! It definitely does a lot of work that Photoshop does for me... but at such a better price ;)
ReplyDeleteI have never heard of this app, but it sounds like a winner, definitely going to try this! Thanks for sharing :)
ReplyDeletehttp://www.mintnotion.com
Nice, never heard of them! I always edit for brightness and if there are blemishes, but I don't usually trust myself to edit teeth, lips, etc.
ReplyDeleteSince I've been shooting in manual mode and overexposing my images a little, the editing for brightness has been much easier!!